This plan is for a 15’x10′ puppy kennel with a concrete-block floor over gravel. A solid concrete pad is better, and pricier and requires a lot more work.
Materials List
- Leather work gloves (this is not a job for a manicure)
- Wheelbarrow, shovel, mattock, metal rake, small sledge hammer, screwdriver, linesman’s wire-cutting pliers, rubber mallet
- Metal corner braces and screws
- 2 ea 16′ PT 2x4s
- 2 ea 12′ PT 2x4s
- 3/8″ washed gravel for leveling.
- 10 rebar cut to 18″ lengths, skinny rebar works here and is easier to hand saw if that’s your only choice
- scrap wood for a scree to smooth gravel
- concrete pavers (we used concrete blocks that are half as deep as the kind used for wall construction and laid them flat so our wall is laying on the ground — 8″tall, 16″ long, 4″ deep — not half-highs, if you order these, they go back!) But you can use any concrete block or paver, we like these because they don’t break! They have holes in them for gripping and moving. And they are cheap.
- Chainlink kennel panels
- 10×20 car canopy to keep the weather off
- Dog house or Puppy Palace.
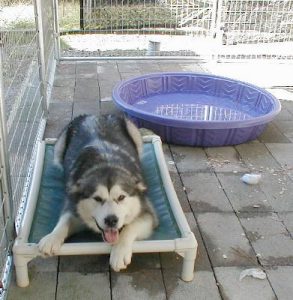
- wading pool or water bucket
Site Selection
- Is it protected from thieves? Ours is behind a driveway gate/fence. And has shade tarps on the sides for privacy.
- Is it protected from other dogs? Our puppy kennel is on the north side of the house. The rescue kennels are 2 fences away on the southwest side of the house. Wayeh kennels are 2 fences away on the southeast side of the house. Yes, puppies need socialization with other dogs — when they are old enough, and not until.
- Is it protected somewhat from weather? Our puppy kennels are on the north side of the house because of summer heat. There are trees on the east and north side of the house as well.
- Will it be at least double fenced, maybe even triple fenced against escapes? Our driveway is gated/fenced for ease of unloading and mushing hook-ups.
- Is it close enough to the house that you will spend a LOT of time socializing puppies? Our first puppy kennel is right up against the basement wall and under the second-story porch for weather protection. This second puppy kennel does NOT share a kennel wall with the first one. What happens if the dog in the first kennel dosen’t like puppies? Or doesn’t like the puppies of the bitch in the second kennel? Or the mother’s fight? We put a 5′ gap between the kennels, which incidentally also allowed for water drainage from the uphill side of the driveway.
- Is the ground somewhat level? Unless you want to bring in heavy equipment, pick a level spot. You will want some drainage — like maybe a 4″ drop across a 15′ span. The nature of the blocks means that water drains out quickly between them, even though you will push and mallet them as close together as possible. Water finds a way. And you will build on a slope with the gravel. But you don’t want it so steep that icy winter conditions make it treacherous. We built ours on the driveway — already graveled and somewhat level, close to the house, and protected from elements, thieves, and escapes.
- Is the kennel layout such that you will wash debris and waste away from the gate and the walkway? We built the first rescue kennels with the gates on the downhill — yuck. We don’t do that anymore. Gates on the uphill, wash away from the gates.
Prepare your Site
You want it level, free from big stones, and free from roots/weeds/shrubs, etc. Your rake and mattock will help here. But if you chose your site wisely, this will be a minimum. We built both a quarantine kennel and a puppy kennel in the driveway because we had a solid base of rock, weather protection, and it was already level.
The more work you do now, the less you will have to do later.
Getting Started, Build a corner
You know that saying that you will never use high-school math in real life? Guess again. Basic Geometry, how to build a right angel, 3-4-5.
Lay out your 2x4s in a rough pattern of where you want the kennel, just to make sure it will fit.
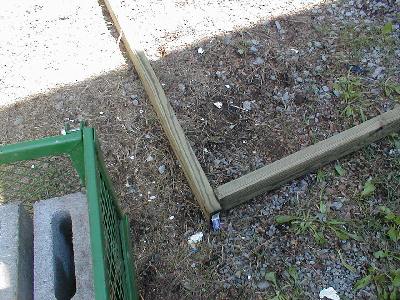
Start on the most downhill corner, whichever way the ground slopes towards, start there. We did not. Deliberately, because we wanted the uphill side of the kennel to be aligned with an existing immovable feature. But really, start on the downhill most corner because gravity will help you now and over the long haul. This will not be square at this point unless you are a magician.
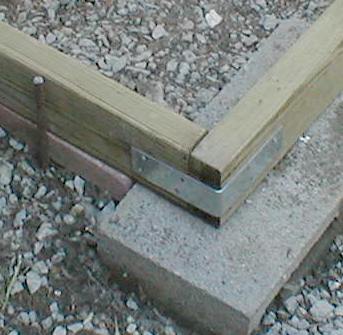
Attach the metal corner brace to a short and a long 2×4 on the most downhill corner. The brace goes on the OUTSIDE of the corner. This is not a real structural issue, it’s to hold it in place and neaten the corner only.
3-4-5… If one side of a right angel is 3′ and the other is 4′, than the distance between those two sides, the long side, will be 5′. That’s not a very mathematical explanation, but it works. So measure down one inside part of your 2×4 and mark 3′. Go back to the corner and measure down the other 2×4 and mark 4′. One of you holds the tape measurer on the 3′ mark and the other moves the 2×4 in or out until the tape says 5′ when it touches the 4′ mark.
Now, while you know where square is, attach the metal corner brace…
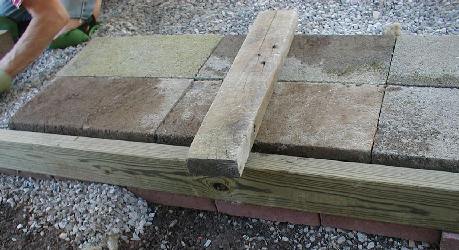
Note, we used block under the corner to get our slope. Well, we should have pushed that block under the wooden corner all the way for a clean outside edge — don’t do it this way. Make it pretty.
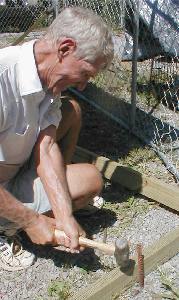
Drive a piece of rebar on the outside of the long 2×4 away from the corner to hold the outside shape of the kennel footing. Make sure the rebar is driven down below the edge of the 2×4 because when you hose off, you’re going to catch every hair and pine needle on anything that sticks up. So the rebar is below the edge of the 2×4 and the 2×4 will be below the top of the concrete flooring.
Do NOT assemble more than one corner at this time. No matter how well you measure, you'll be off. Build your corners as you come to them.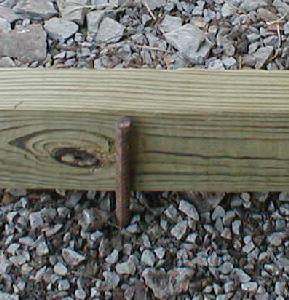
But go ahead and drive 3 rebar along the outside of the 16′ 2×4 and 2 rebar along the outside of the 12′ 2×4 so you have a solid corner to work from.
Gravel
We use 3/8″ washed gravel because it is easy to work with by hand and it smooths nicely to get the block leveled.
We built on a driveay made from 3/4″ crusher run. We leveled with a rake and mattock, build a corner, and now we’re ready to put the gravel in.
Fill in enough gravel so your concrete paver blocks will rest just above the top of the 2x4s. You want the 2×4 edge to be below the top of the block so hose-offs will go off the concrete block down to the 2×4 and away. This can be 1/2 inch only. Just so long as it goes down and not up — every hair and pine needle and piece of whatever will catch if you have a lip there.
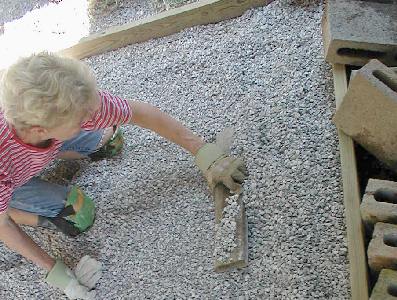
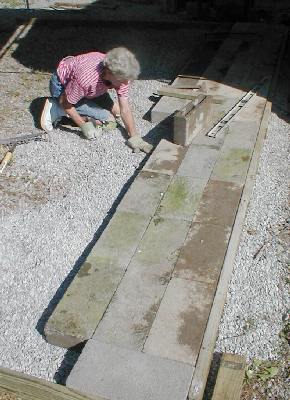
Dump gravel. Smooth with rake. Smooth with hand — this is on-your-knees or bent at the waist work.
Note the small red bricks under the edge of the 2×4 because we were building a good angel for drainage. Dump a load of gravel in the corner and then smooth with a short scrap of wood as a scree.
Lay Block
These are concrete blocks like you’d build a wall with, but they are thinner and we lay them on their sides so they are 4″ tall, flat side on the top and bottom, holes on the sides.
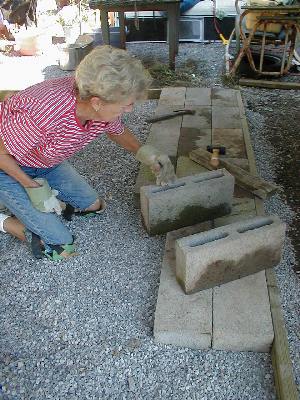
Note the block. We re-used what we had already, so they are muddy. That can be fixed after they are down with a little soap and water. We have to disinfect them anyway before we put pregnant moms on them.
So to get started…
The block will be above the level of the 2×4. If it’s not, take it out, push more gravel in, smooth, and re-lay the block.
Note: We place the block so the long side is pointed uphill. If you have to scoop or hose the kennel, it works better this way than if you lay them crossways.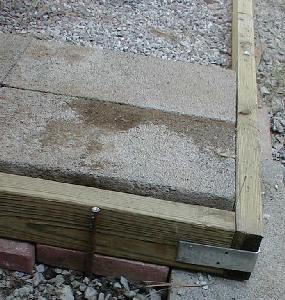
Keep laying blocks. Use a rubber mallet and pound down every corner (remember these are hollow, don’t pound over the hollow part). And pound the block from the side so it pushes up against its neighbors. Use your scree to make sure you’re still above the level of the 2×4 and that the blocks are all laid in a plane — their tops don’t go up and down.
After a few rows, start using a 4′ level to check. We had no intention of being perfect. We just wanted to be close.
Finish the square – more corners…
Corners are a pill. You can make them pretty as well as functional. We didn’t saw the lumber to length. And we cobbled one of the metal corner braces and straightened it back out — do what you have to. The “kennel police” are not allowed to inspect our dog kennels and if it works… it works.
We did turn the last row of block sideways to accommodate the length of kennel we wanted… And we went back and raked gravel up against the 2x4s to get the drainage ditch away from the kennel itself.
Here’s another corner, built as we came to it. The metal brace is in the L on the outside of the 2x4s but hard to see with the shadow. Note the block is ABOVE the top of the 2×4 barely, but still above. That’s all that counts with drainage.

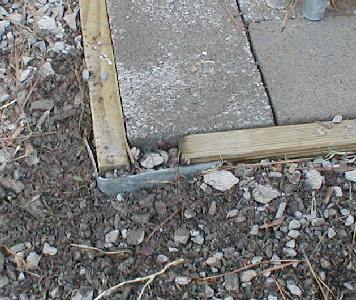
And this is the last corner. The only block that had to be custom cut — and we will go BACK and get a solid so we can shave off the exact size we need. This is temporary until we get to that detail. We’ll dig this out, pull the 2x4s together and fit the custom block. Meanwhile we filled in the hole with a broken block and gravel.
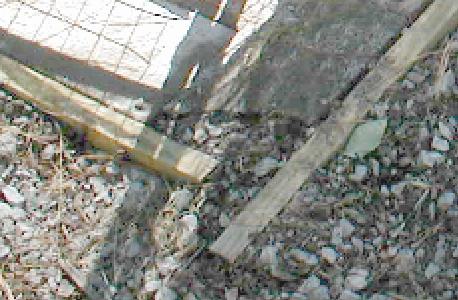
Also note how the 2x4s were partially buried back with excess gravel in a short ramp against all sides — this makes the whole kennel and floor sit UP from the water paths around it.
Clean the Kennel
If you use new or used block, you’re going to want to really scrub it clean, plus all the things you put in the kennel — before you let a dog, a pregnant mom, or a puppy on the kennel. New blocks have a very gritty, corrosive dust on them, and used blocks… well, you can guess what might be on them.
Our normal kennel cleaning routine involves Joy Green Tea Aromatic Release dishwashing soap. We suds them up in all the buckets, on the beds, in wading pools, in the plastic dog houses, and then dump on the kennel block. Since you placed the kennel next to water, you’ll have a hose handy for starting in the uphill corner and washing all the blocks all the way down the kennel to the far end.
You’ll get a chance to see where the dips are as well. You can take an oversized flat screwdriver and pry up low blocks and put a few gravels in and then replace the block to fill in any dips.
And you’ll get to see what the water runoff pattern will be in a rain storm. Now is the time to fix drainage problems — before the dogs are moved in.
Then once we have suds and hosed off every inch, we refill the buckets with water and bleach, dump them over the same block and do not rinse. Then refill the water buckets one last time with fresh drinking water.
Then once we have suds and hosed off every inch, we refill the buckets with water and bleach, dump them over the same block and do not rinse. Then refill the water buckets one last time with fresh drinking water.
Set up kennel panels & shade tarps
We have used chainlink kennels for years. Still have our 20-year-old Mason kennels that Mason came out and we strung with wire. They are EXCELLENT, heavy gauge mesh, and last a long time, obviously. But we found that a determined Malamute can pull the wire loose, even as excellent a job as Mason does — and they can come out to your house to do the work on site as well!
So we searched for something a little more… and found www.optionsplus.com — their prices included freight shipping delivery to the street our front because of our business status (rescue kennels). We had to uncrate and load into our pickup — but it wasn’t difficult with just me and the driver.
We tried the Silver series and a determined Malamute can eat their way through the welded WIRE. But the Platinum series is simply awesome. The gates are so sturdy you won’t believe it. The panels are strong and Malamute-proof, and the Platinum is made from welded RODS which is significantly stronger than the silver. Our intention, finances permitted, is to replace our silver series with platinum with time. All but one of our gates is Platinum and we have had ZERO escapes or kennel damage to our 2 Platinum kennels. I think you could house a tiger in these things.
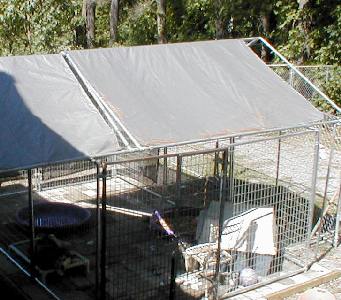
As well as the kennel panels (10×15) we put a kennel canopy over the first 10 feet of the kennel (here you can see it hooked to another one that shades the first puppy kennel.) Sunlight still hits the front in the mornings and the back in the evenings, and sun is your best disinfectant. But most of the kennel will be shaded all day long.
And we hung 10×6 mesh shade tarps over the public end of the kennels but up a foot to ease hose-outs. Here are the shade tarps viewed from inside the kennel… We started on the side of the kennel and wrapped the end for privacy. Each of these Silver Options Plus panels is 5′ wide and 6′ tall. We stopped the tarp about 8″ up off the ground because of splatter during hoseouts.
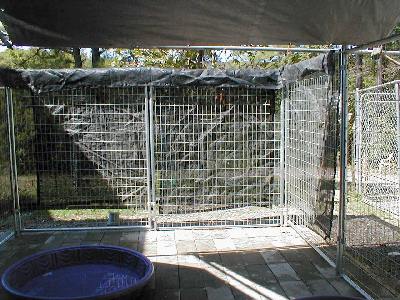
(Wading pool in the foreground, kennel canopy on the upper edge of the picture)
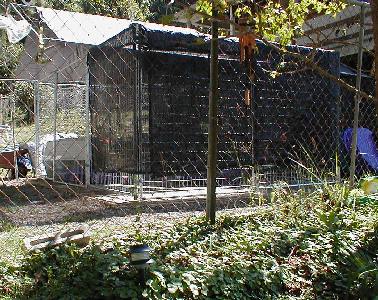
And this is what it looks like from outside our perimeter fence…
Can you see inside? Except the doghouse on the left? Nope? That’s the point. (Also note, we gave up on landscaping INSIDE the fences years ago…)
Furnish the kennel

What you put in your puppy kennel is as individual as you, your breed and your bitch.
Besides a plastic doghouse… (wee pads in front)
we use a plastic wading pool with wood shavings for mom and the puppy in good weather. We will put 1″ of water in the bottom of a wading pool and steps up and out when the pups are old enough to climb safely. Stainless Steel water buckets. Stainless steel feed buckets (we don’t restrict food for puppies so long as they don’t get fat). A metal chair for my poor knees. A hanging clothes hamper for puppy swings.

A hanging toy with bells on the string for puppy play. A teeter-totter. Toys, toys, and more toys.

But everything can be hosed off and disinfected.
Oh, and mom’s love their Karanda beds for lounging…