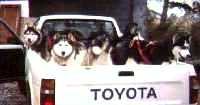
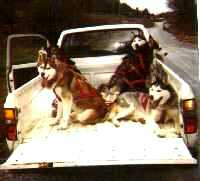
My small ’93 Toyota truck will hold 3ea 400-sized crates and with lots of bungee cords will strap a sled and equipment on top of the crates. This is not enough to do the job. I’ve seen some scary setups and I wanted something less hillbilly redneck and more safety-conscious.
I needed something that would:
- Transport 8 dogs & 2 people in the dry with a sled (or a cart), plus gear;
- Transport remodeling supplies, yard supplies, or normal home owner stuff;
- Commute 100 miles/day to work, 30,000 miles/year;
- Pick up and deliver rescue dogs (often out-of-state); and
- Attend 2-day dog shows a day away with 2 dogs, plus gear.
And I wanted to spend less than $1000, a lot less, if possible. I figured I had three options — dogbox, trailer, or no change. A new truck or van or SUV was not an answer, oh well. I started out with the intention of building a dogbox, I even had rough draft plans, and I compiled notes and suggestions from the Sleddog-L email list. I researched a trailer, and I couldn’t really do nothing because I had too many problems. Then I decided against the whole concept of a dogbox or dog trailer in favor of a camper shell. Here’s why.
This was the natural instinct because they are sled dogs and you need a dog box — like you need a sled. Every dog driver has a dogbox! I researched this idea for over a year.
Advantages:
- Individual compartments,
- Security against mass escapes,
- Dry dogs,
- Bounce-factor in case of accident or sudden braking, and
- Amateur weekend construction, relatively cheap, estimate $400.
Disadvantages:
- Cannot haul anything but dogs, sled, & gear;
- Individual compartments are harder to clean out;
- Removing dogbox would be a pain by myself just to haul in some lumber, topsoil, etc.;
- (Minor point) would impact resale of truck to have holes drilled in sides; and
- Looks, I could not do a professional job with this thing, my skills are strictly amateur-level (but I was willing to live with the results).

Dog Trailer
This was the next logical idea. But after getting lots of flyers & catalogs, I shot it down as well.
Advantages:
- Individual compartments,
- Security against mass escapes,
- Dry dogs,
- Bounce-factor/safety in case of accident or sudden braking,
- Low center of gravity,
- Plenty of room, and ease of loading, for sled and cart and gear, and
- Professional construction with more experience than I have if I purchase.
Disadvantages:
- Individual compartments are harder to clean out;
- Protection from being hit by another vehicle (I know, I know, but the safety record of dog trailers does not impact my gut feeling and I was uncomfortable with this one);
- Backing up with a trailer, parking with a trailer;
- Need professional help with axel and welding, estimate $1000 if I build; and
- Purchase price of ~$5,000 if I get ready-made.
Camper Shell

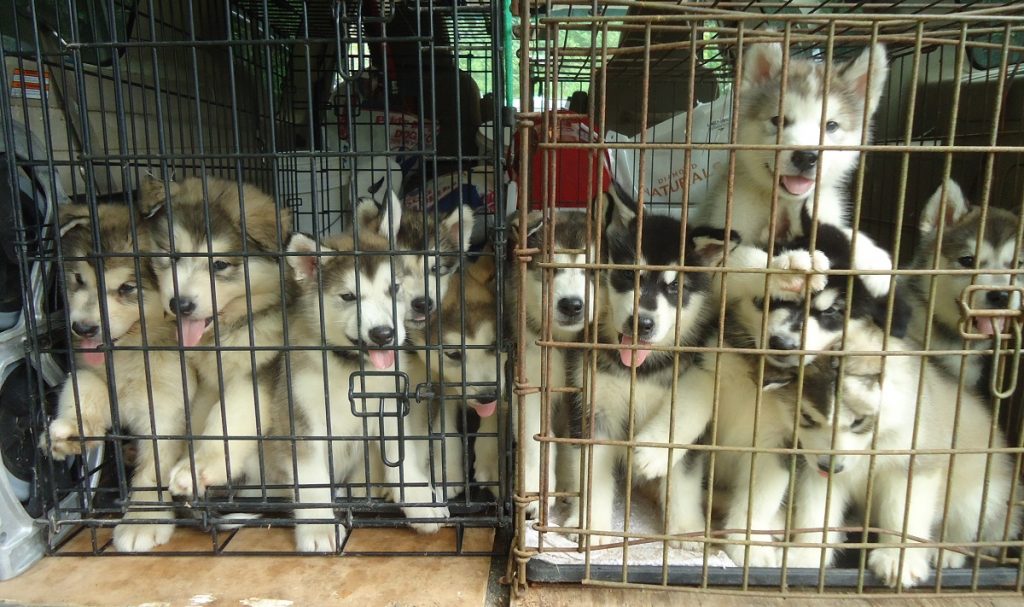
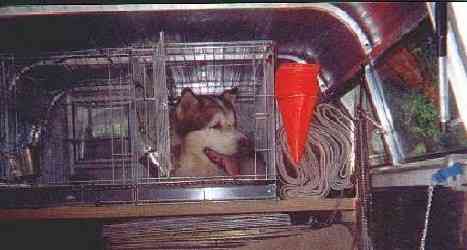
Then I saw a picture in a mushing book that changed everything — a normal camper shell with hay in the bottom and tie-downs for the dogs. Then I met Gale Motter who had the same setup with no tie-downs and two exceptional dogs that did not jump out.
Advantages:

- Security against mass escapes (with tie-down system);
- Dry dogs;
- Easier to clean out — garden hose, one compartment;
- Sled can be slid on top of shell and tied in place (See Sled Rack);
- Purchase shell, bed liner, & sliding rear window, $600; tie-down system $100; and
- Haul groceries, lumber, etc. when dogs are not present.
Disadvantages:
- No individual compartments which could lead to fights;
- Cannot get cart on top of shell — weight and awkwardness (but since running more than two dogs on a cart is suicidal, dogs can be tied in front and cart stuck out tailgate);
- Have to remove shell when want to haul gravel, mulch, bulk goods, etc.
- Bounce factor/safety, the dogs would be constrained by only their nylon buckle collars; and
- Must design a tie-down system that lets me get to the dogs in the back without getting in the truck AND keeps them from getting entangled. (See Tie-down System.)
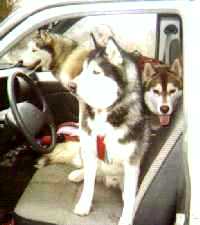
So I decided on the camper shell and I LOVE IT. My truck is just a truck with no holes drilled in it and no significant impact on gas mileage. I can haul anything I want (except the cart and I’m working on a folding steering bar for that). Dogs love to hop in the truck and rescues are no problems. I went with a used bed liner instead of hay so hosing out is a breeze at the car wash. And the price was right.


It’s one of those things that you can’t believe you didn’t do earlier. Like a fenced yard connected to the back door so all you have to do is open the door and say out. Like crates in the basement instead of the kitchen do the mud stays downstairs. Like putting a used refrigerator in the crate room for wormer, medicines, special diets for the dogs, and soda for me. Like a gate at the top of the stairs to the deck so muddy canine feet stay off my doors and windows. Like plexiglass over the 54-year-old glass backdoor.
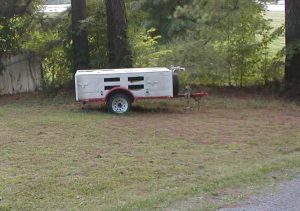
(Update: Have since purchased a cart that folds flat and fits inside the shell. And bought a trailer and built a dogbox on top – i.e. dog trailer. The shell just didn’t work for gear, cart, and 10 dogs.
Rough Plan for DogBox
I spent a year working this out — without building a thing except small paper models. But I had plenty of time loading dogs in and out of crates to have a good idea of things that would NOT work. For a small 2WD Toyota truck (sits lower than a 4WD) I had decided to build the following box:
The box sat INSIDE the truck bed on the flat between the wheel wells for:

1) A lower center of gravity and lower wind resistance,
2) Simplicity of construction (rectangles instead of shapes that fit around wheel wells, the sides of the truck, etc., and
3) Safety (the tailgate would close over the rear doors).
Built in two sections so I could load and unload without help.
1) Divide the truck bed in thirds front to back. The front third is a dogbox that stretches the width of the truck with a door on either side, left and right. This section is separate from the back section and is semi permanent (I wasn’t going to remove it very often and I would use it as storage.
2) The rear two thirds is in the form of two boxes, running front to back, with doors at the tailgate.
Outdoor grade plywood, 1/2″ on the top and bottom, 3/4″ on the sides and doors because that’s the heavy chew area. 2″x2″ PT for the frame Door stops of 2″x2″ PT so the doors could not be forced in by excited or determined dog. Stops were uprights that partially blacked the door opening (an inch on either side) to take the brunt of dog’s escape attempts instead of the hardware. Paint the whole thing inside and out with white paint. Hinge the tops for clean-out. The dividers between the sections would have nearly full “windows” of expanded metal for summer use as much as winter. Small windows in side doors and sides, not rear so cut down on exhaust — but the thing is very well ventilated with divider windows. Sliding front window blocked by expanded metal that meets the sliding rear window in my truck so I can see the dogs while driving. Runners of 2×2 under the thing so it will slide in. Sled racks on top an inch wider than my sled runners made of 2x2s and eyebolt tie-downs. Eyebolts inside to hang Stainless Steel water buckets.

Heavy duty latches for doors.
Suggestions from Sleddog-L
My dogbox would not have looked like anyone else’s, but then dog drivers are independent types anyway, so que sera sera.
In no particular order:
Catalog to order dogboxes (816)263-5533.
John Conrad has detailed plans available for $10 and will custom design the plans for $25.
Use boat-straps to hold down if don’t want to drill holes for boxes that set up on truckbox — also gives storage underneath for gear.
Set it on dense Ethafoam (DuPont) pads, about 2″ thick.
Top and bottom are 5/8″ plywood. Sides, and inside dividers are 1/2″ plywood. Top has sheet metal for rain shedding, and reflect hot sun.
All plywood edges are joined with 2×2 lumber along inside corner of seam.
Drywall type (galvanized, though) screws used throughout.
Use heavy-duty expanded metal (for example) for screens, unless you’re transporting Beagles or something.

I built a dog box for a ford ranger last fall. It has 3 holes on one side and 4 on the other. There is an open section for storage that runs the entire length of the both down the middle that is accessed from the back.( I am not sure this was worth the effort as I found I never used it. Some boxes tacked onto the back that overhang would be better for storing stuff.) The larger boxes (on the 3 hole side) are good to double up dogs if needed and overnight them when on trips. I made it mostly from materials I got from an cedar porch that someone removed. I took the 2×10’s and ripped them in half and made the frame from these. I bought plywood for sheathing the outside.(5/8″ for the sides, 3/4″ for the top and bottom. I lined the inside of the boxes with cedar from the old porch. The inside partitions can be any scrap of thin plywood, 3/8″ or 1/2″ will do. I cut holes in the doors from patterns of dog’s heads and covered the holes with metal mesh. I lined the front of the box (inside) with 3/16″ plastic (the bottom of a toboggan sled that had broken) to keep the dogs from chewing/clawing up the wood. I put eye bolts in the top for tying the sled on. These are screwed into the frame. There are gaps and holes drilled in the partitions inside the box to allow air to pass through. These should be put in the back wall too. It will reduce the amount of condensation from the dogs and also allow air to flow through when driving in high cross winds. I know of 2 mushers in the last year who have had their dog box blown off their truck! Others I know have had accidents do to the influence of the wind on the truck. I bolted the whole thing to the side of the bed with 6 large bolts with locking washers and nuts. I put 2×4’s on the bottom of the box after I got it lined up. They run along the side, butted snug to the side of the bed. Once these are in (screwed in from the top, inside the boxes), the box can not shift. For latching the doors, I would recommend using the latches that have the very large handles. The small ones are too hard to deal with when they are frozen, straw gets jammed in the way, and you have gloves on and you are tired and have a squirmy dog in your arms. Rae’s harness shop or Cold Spot Feeds carry them. They only cost $2 more, but are well worth it. I would also recommend putting some kind of trim on the back along the top. This will act as a batter board for when you load and unload sleds. It will protect the top of the box and is easily replaced when totally trashed. A quick coat of paint will make it look new again too. When you get the box on, check out what it does to your truck’s front end. You may need to add a leaf spring to compensate for the added weight. Make sure you account for the weight of the dogs, sled, driver, etc. Often the weight will cause front end alignment problems and tire wear.
Good luck. Let me know how it turns out.
Happy Trails!
After 350,000 miles, the Toy truck was retired for a minivan. I could aircondition the dogs and add a tow package and still use the dog trailer. And could install the dog box on top of the dog trailer as needed.